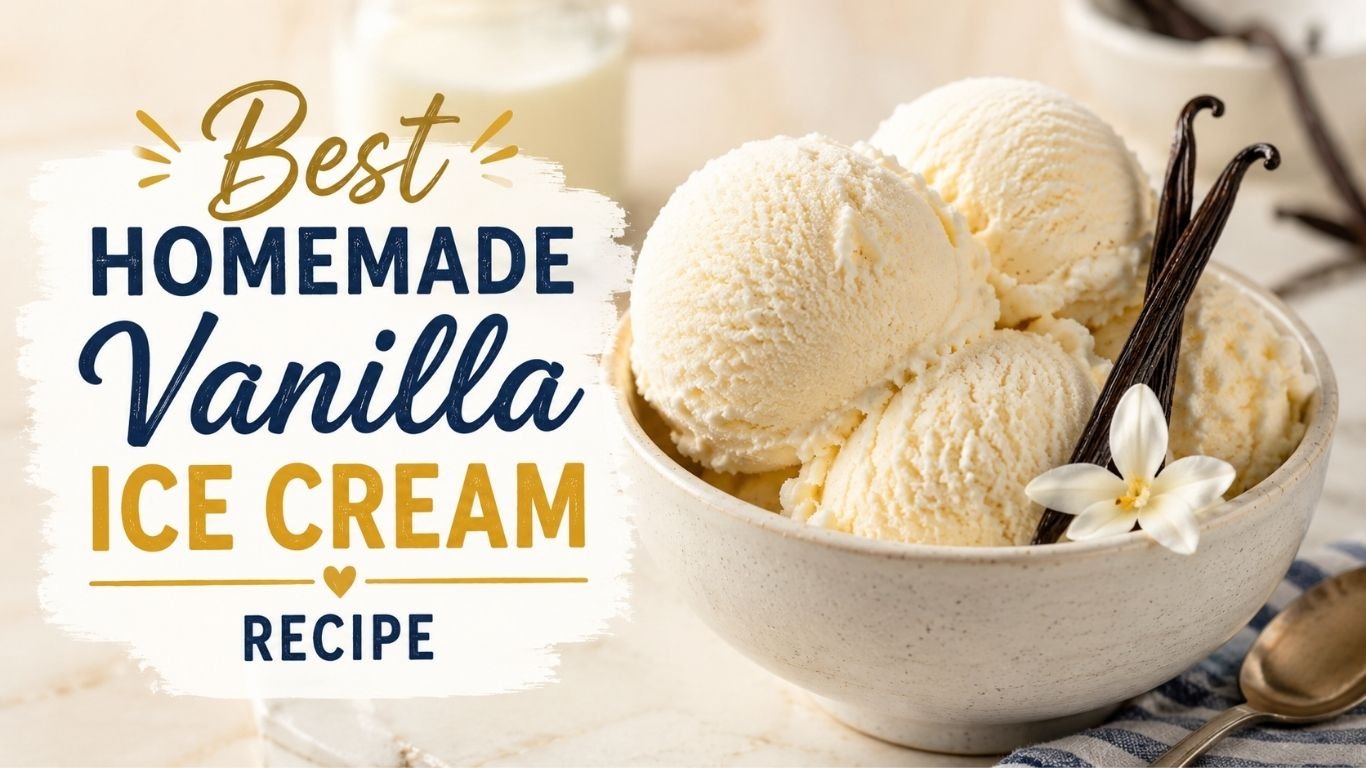
I still remember the exact moment I fell in love with homemade vanilla ice cream. It was a sweltering July afternoon, and my grandmother pulled a dented metal canister out of her old hand-crank machine, letting me scrape the dasher with a spoon. That first taste — dense, custardy, perfumed with real vanilla — made every grocery store carton feel like a lie from that day forward.
After years of testing recipes on this blog (and consuming way more ice cream than any doctor would recommend), I’ve finally landed on the recipe I’m convinced is the absolute best. It’s rich without being heavy, deeply vanilla without being artificial, and achieves that perfect scoop-able texture that doesn’t turn into a frozen brick overnight.
Whether you own a fancy compressor machine or a basic bowl-style maker, this recipe works beautifully. And yes, I’ll even show you how to make it without an ice cream maker.
Let’s make some magic.
Why This Recipe Works
Before we dive into the “how,” let me explain the “why” — because understanding the science behind great ice cream will make you a better ice cream maker overall.
This recipe is a French-style custard base (also called a crème anglaise base), which means it uses egg yolks cooked into the cream mixture before churning. Here’s why that matters:
- Egg yolks = emulsification. The lecithin in egg yolks binds fat and water molecules together, creating an unbelievably smooth, creamy texture with no icy crystals.
- A higher fat ratio = fewer ice crystals. We’re using heavy cream and whole milk for the ideal fat percentage — rich enough to be indulgent, fluid enough to churn properly.
- Real vanilla beans = complexity. Vanilla extract is fine. Vanilla bean paste is great. But splitting an actual vanilla pod releases hundreds of aromatic compounds that extract simply can’t replicate.
- The cooking step = flavor development. Gently heating the custard doesn’t just cook the eggs safely — it develops a subtle cooked-milk sweetness that store-bought ice cream fakes with additives.
I’ve tested this recipe with different sugar types, fat ratios, egg counts, and vanilla sources so you don’t have to. This is the version I make for dinner parties, for my kids’ birthdays, and honestly, for myself on Tuesday nights.
A Quick Note on My Testing Process
I don’t publish recipes I haven’t made at least five times. For this one, I made it eleven times across different machines, different seasons, and different vanilla sources. I tested:
- 2 egg yolks vs. 4 vs. 6 (four is the sweet spot)
- All heavy cream vs. a cream/milk blend (blend wins)
- Vanilla extract vs. paste vs. whole beans (beans win, paste is an excellent runner-up)
- White sugar vs. a mix with corn syrup (adding a small amount of corn syrup dramatically improves scoopability)
- Churning times from 20 to 40 minutes
The recipe below reflects everything I learned from that process.
Ingredients & Why Each One Matters {#ingredients}
Makes approximately 1 quart (about 8 servings)
| Ingredient | Amount | Notes |
|---|---|---|
| Heavy whipping cream | 2 cups (480ml) | Must be heavy cream — half-and-half won’t work |
| Whole milk | 1 cup (240ml) | Full fat only for best texture |
| Granulated sugar | ¾ cup (150g) | Regular white sugar works perfectly |
| Light corn syrup | 2 tablespoons | Secret weapon for scoopable texture |
| Large egg yolks | 4 | Room temperature |
| Vanilla bean | 1 whole pod | Or 2 tsp pure vanilla extract/paste |
| Fine sea salt | ¼ teaspoon | Balances and enhances sweetness |
Let’s Talk About Each Ingredient:
Heavy Whipping Cream (36%+ fat)
Don’t substitute. The high fat content is what gives ice cream its signature richness and keeps ice crystals from forming. Ultra-pasteurized cream is fine, though regular pasteurized will give you a slightly more pronounced dairy flavor.
Whole Milk
The milk provides balance and makes the base fluid enough to churn properly. Skim or 2% will result in an icier, less creamy texture. Trust me — this is not the recipe to go low-fat on.
Granulated Sugar
Sugar does more than sweeten here. It actually lowers the freezing point of your ice cream, which is a big part of why homemade ice cream stays scoopable instead of freezing solid. Don’t reduce it significantly, or you’ll end up with a rock-hard dessert.
Light Corn Syrup
This is the trick most home recipes skip. Corn syrup is an invert sugar — it contains glucose and fructose in their separated forms, which interferes with ice crystal formation even more effectively than regular sugar. Just 2 tablespoons makes a noticeable difference in how cleanly your ice cream scoops right from the freezer. If you’d prefer not to use it, you can substitute with the same amount of honey (it will add a very subtle honey note) or simply omit it.
Egg Yolks
Four yolks is the magic number I settled on after extensive testing. Two yolks produces a texture that’s barely better than no-egg bases. Six yolks makes it taste almost too eggy — closer to frozen custard than ice cream. Four gives you luxurious creaminess without a pronounced egg flavor.
Vanilla Bean
One plump vanilla bean scraped into your cream will give you the most complex, aromatic vanilla flavor you’ve ever tasted in a frozen dessert. Look for Grade A Madagascar Bourbon or Tahitian vanilla beans. Tahitian beans have a slightly floral, cherry-like quality; Madagascar beans are more classic and sweet.
Can’t find or afford vanilla beans? Vanilla bean paste (1:1 substitution for extract) is my second-choice — it contains real vanilla seeds and has a concentrated flavor. Pure vanilla extract (2 teaspoons) is perfectly acceptable and still miles above any imitation vanilla.
Fine Sea Salt
A small amount of salt is absolutely essential in any sweet recipe. It suppresses bitterness, enhances the vanilla aroma, and makes the overall flavor more rounded and complex. Don’t skip it.
Step-by-Step Instructions {#instructions}
Step 1: Prepare Your Vanilla
Split your vanilla bean lengthwise with a sharp paring knife. Open it flat and use the back of the knife to scrape out the dark, fragrant seeds inside — this paste is pure vanilla gold.
Add both the seeds and the scraped pod to a medium saucepan with your heavy cream and whole milk. This is called infusing, and it’s what gives this ice cream its incredible depth of flavor.
Step 2: Heat the Cream Mixture
Over medium heat, warm the cream, milk, vanilla seeds, and pod together until the mixture just barely begins to steam and you see tiny bubbles forming around the edges. You’re looking for about 170°F — do NOT let it boil.
Remove from heat and let steep for 15 minutes with a lid on. The longer you steep, the more vanilla flavor you extract.
💡 Sarah’s Tip: If you have the time, after steeping you can refrigerate this entire mixture (pod and all) overnight. A cold infusion overnight extracts even more flavor compounds from the vanilla, resulting in a noticeably more aromatic base.
Step 3: Whisk Your Egg Yolks and Sugar
While the cream steeps, add your 4 egg yolks, sugar, corn syrup, and salt to a medium bowl. Whisk vigorously for about 2 minutes until the mixture becomes pale yellow and slightly thickened. This process is called “blanching” the yolks, and it dissolves the sugar fully and prepares the yolks to absorb the hot cream without scrambling.
You’ll know it’s ready when the mixture falls from your whisk in a thick, smooth ribbon.
Step 4: Temper the Eggs (The Crucial Step!)
This is where many home cooks make mistakes — but once you understand the technique, it becomes second nature.
Remove the vanilla pod from your cream mixture. Reheat the cream gently until steaming again.
Now, while whisking your egg mixture constantly, slowly pour in about ½ cup of the hot cream in a thin, steady stream. This is called tempering — you’re gradually raising the temperature of the eggs so they don’t cook and scramble when they hit the hot cream.
After adding that first ½ cup, add another ½ cup while still whisking. Now you can pour the warm egg mixture back into the saucepan with the remaining cream, whisking as you pour.
Step 5: Cook the Custard
Return the saucepan to medium-low heat. Switch from your whisk to a silicone spatula and stir constantly, making sure to scrape the bottom and corners of the pan in a figure-8 motion.
Cook until the custard reaches 170-175°F (77-79°C) on an instant-read thermometer. At this temperature, the custard will be thick enough to coat the back of your spatula — when you draw your finger across the spatula, the line should hold clean and not run together.
This typically takes 8-12 minutes. Do not rush this over high heat.
⚠️ Warning Signs:
- If you see steam rising aggressively, your heat is too high — reduce it immediately
- If you see any small lumps forming, your eggs are beginning to scramble — immediately pull off heat and strain it at once
Step 6: Strain and Chill
Pour the finished custard through your fine-mesh strainer into a clean bowl set over a larger bowl filled with ice water (an ice bath). Press any remaining vanilla seeds through the strainer with a spatula — don’t waste them!
Stir the custard occasionally as it sits in the ice bath. You want it to cool to below 40°F (4°C) as quickly as possible. This typically takes 20-30 minutes.
Once cold, cover the bowl with plastic wrap (pressing it directly to the surface of the custard to prevent a skin from forming) and refrigerate for at least 4 hours, preferably overnight.
💡 Why chill so long? A fully chilled base will churn faster, incorporate air more efficiently, and produce a notably creamier final texture. This step is worth the patience.
Step 7: Churn
Pour your chilled custard into your pre-frozen ice cream bowl (or compressor machine) and churn according to your manufacturer’s instructions.
For most home machines, this takes 20-25 minutes. The ice cream is ready when it reaches a thick, soft-serve consistency and pulls away from the sides of the bowl.
💡 Don’t over-churn! Once the ice cream has reached soft-serve consistency, it’s done. Over-churning can cause the butter fat to separate, making your ice cream greasy.
Step 8: Harden in the Freezer
Transfer your soft ice cream to your freezer container. Smooth the top, press plastic wrap directly to the surface, and seal the container.
Freeze for at least 2 hours (4 hours is better) until firm enough to scoop.
This final hardening step is called “ripening” by professional ice cream makers, and it’s what transforms your soft-churned ice cream into a proper, scoop-worthy dessert.
No-Churn Vanilla Ice Cream Method
No ice cream maker? No problem. This method skips the machine entirely and still delivers incredibly creamy results, though the texture will be slightly denser than the churned version.
Additional ingredient needed:
- 1 can (14 oz) sweetened condensed milk
Method:
- Skip the custard-making process entirely. Instead, whip 2 cups of heavy cream to stiff peaks using a hand mixer or stand mixer.
- In a separate bowl, whisk together the sweetened condensed milk, 2 teaspoons vanilla extract or paste, and ¼ teaspoon salt.
- Gently fold the whipped cream into the condensed milk mixture in two additions, being careful not to deflate the cream.
- Pour into your freezer container, smooth the top, press plastic wrap to the surface, and freeze for 6-8 hours or overnight.
The result is a surprisingly creamy, scoopable ice cream — though it lacks the deep custard complexity of the churned version. Think of it as a completely different (and delicious) approach rather than a compromise.
Pro Tips for Perfect Ice Cream Every Time
After making this recipe eleven times and ice cream in general for over a decade, here are the tips that made the biggest difference:
🌡️ Temperature is everything.
Your instant-read thermometer is the most important tool in this recipe. Custard under 170°F may be unsafe due to undercooked eggs. Custard over 180°F risks scrambling and becomes grainy. Hit that 170-175°F window and you’re golden.
❄️ Chill your base COMPLETELY before churning.
I know, I know — it requires patience. But warm or even cool (not cold) custard will churn into a soupy, poorly textured result. Your base should be fridge-cold, ideally 36-38°F before it goes into the machine.
🥣 Freeze your bowl completely.
If you’re using a bowl-style machine (like the Cuisinart ICE-21), that bowl needs to be thoroughly frozen — at least 24 hours in your freezer, ideally 48. Shake it before using; if you hear liquid sloshing inside, it’s not ready.
🧂 Don’t skip the salt.
Even though it seems counterintuitive in a sweet recipe, salt makes vanilla taste more like vanilla. Science.
📦 Use a shallow, wide container for storage.
More surface area means the ice cream freezes more evenly and thaws more evenly. Tall, narrow containers lead to unevenly frozen ice cream.
🍦 Let it temper before scooping.
Pull your ice cream out of the freezer and let it sit at room temperature for 5-10 minutes before scooping. This is what professional scoopers call “tempering” — it makes for cleaner, rounder scoops and a better eating texture.
💧 Warm your scoop.
Run your ice cream scoop under hot water and dry it briefly before each scoop. The warm metal helps glide through the ice cream smoothly.
Flavor Variations
Once you’ve mastered this base, you can spin it in countless directions. Here are my favorites:
🍫 Chocolate Swirl Vanilla
After churning, drizzle in ⅓ cup of homemade chocolate fudge sauce as you layer the ice cream into the container. The sauce will harden into gorgeous, snappy ribbons.
🍓 Strawberry Vanilla
Macerate 1 cup of chopped fresh strawberries with 2 tablespoons of sugar for 30 minutes. Fold into the ice cream in the last 2 minutes of churning.
☕ Vanilla Coffee
Add 2 tablespoons of finely ground espresso to the cream while it heats. The coffee infuses beautifully and plays off the vanilla in incredible ways.
🧁 Birthday Cake Vanilla
Add ½ teaspoon of almond extract along with the vanilla, and fold in ¼ cup of rainbow sprinkles and ¼ cup of crumbled vanilla wafer cookies after churning.
🥃 Vanilla Bourbon
Stir 2 tablespoons of good bourbon into your completely cooled custard base before churning. The alcohol lowers the freezing point even further, making this your most scoopable batch yet.
🌿 Tahitian Vanilla Bean with Honey
Replace the corn syrup with honey and use a Tahitian vanilla bean instead of Madagascar. The result is floral, complex, and stunning.
How to Serve Vanilla Ice Cream
A good vanilla ice cream is one of the most versatile desserts in your repertoire. Here are some of my favorite serving ideas:
- Classic: A simple scoop in a bowl with a waffle cone alongside
- Affogato: Pour a shot of hot espresso over a scoop — the contrast of hot coffee and cold ice cream is extraordinary
- Ice cream sandwich: Between two thick chocolate chip cookies
- Float: A generous scoop in a cold root beer or cream soda
- À la mode: Alongside a warm slice of apple pie or peach cobbler
- Banana split: The classic, with all the fixings
- Milkshake base: Two scoops blended with ¾ cup whole milk
Storage Instructions
How long does homemade ice cream last in the freezer?
Homemade ice cream is best enjoyed within 2 weeks of making it. Unlike commercial ice cream, it doesn’t contain stabilizers and preservatives, so texture and flavor quality decline after that point.
Best storage practices:
- Always press plastic wrap directly to the surface of the ice cream before sealing the container — this prevents freezer burn and the formation of icy crystals on top
- Store in the coldest part of your freezer (usually the back)
- Avoid storing next to strongly scented foods — ice cream readily absorbs odors
- If your ice cream develops frost crystals on top, simply scrape them off before serving
Can you re-freeze melted ice cream?
You technically can, but I don’t recommend it. Refrozen ice cream loses its incorporated air, becomes denser, and develops more ice crystals. It’s safe, but the quality suffers noticeably.