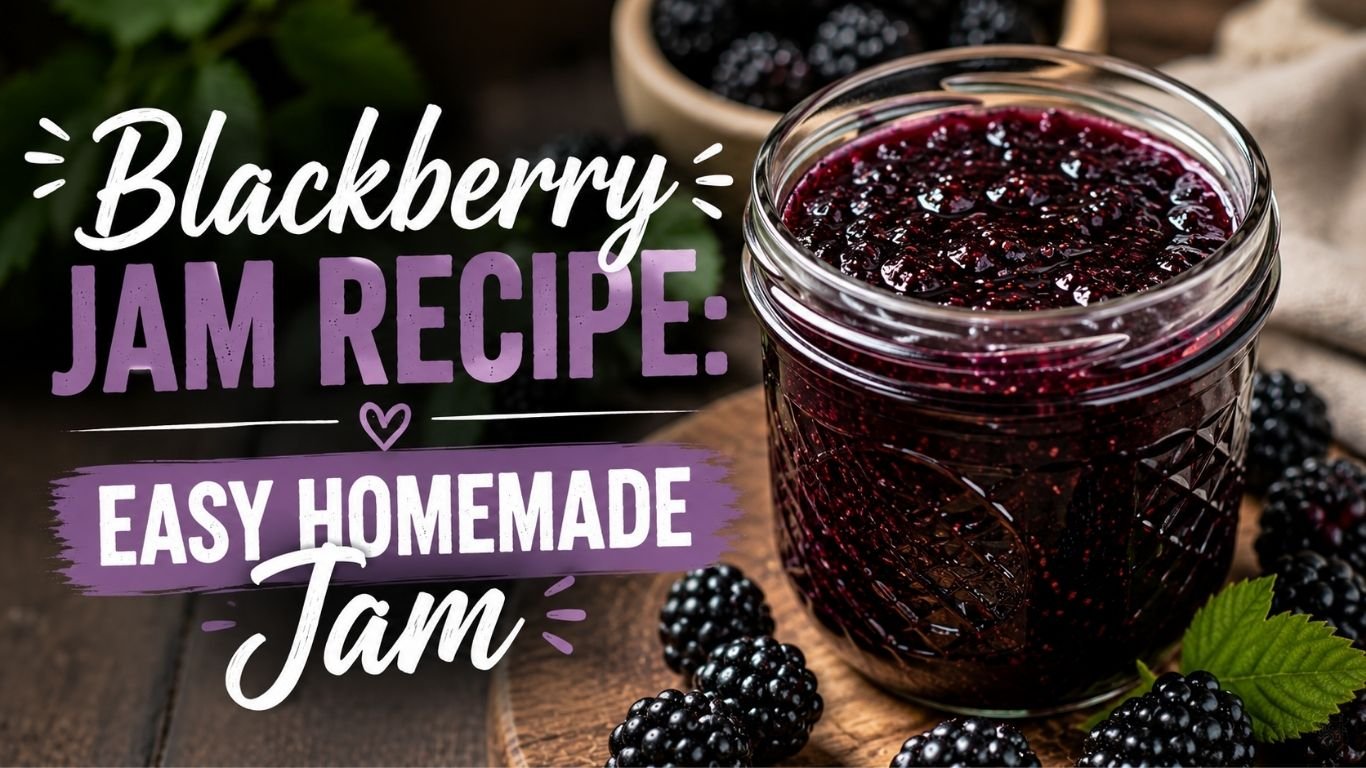
There’s something almost magical about turning a bowl of fresh blackberries into a glossy, deep purple jam that you made yourself. I remember the first time I tried making homemade blackberry jam — I was nervous about the whole canning process, convinced I’d mess it up somehow. But it turned out to be one of the most satisfying things I’ve ever made in my kitchen, and now it’s a late-summer tradition I genuinely look forward to.
This blackberry jam recipe is straightforward, uses just a few ingredients, and delivers rich, fruity flavor that store-bought jam simply can’t match. Whether you’re picking blackberries from your backyard, a local farm, or grabbing a flat from the farmers’ market, this recipe will walk you through everything you need to know — from prep to the satisfying pop of a properly sealed jar lid.
Why You’ll Love This Blackberry Jam Recipe
- Only 3 basic ingredients — no fancy equipment required
- Works with fresh or frozen blackberries
- Options for pectin or no-pectin methods
- Includes a seedless jam variation for smooth texture lovers
- Detailed canning and storage guidance so your jam stays safe and delicious
- Tested small-batch friendly — make just 2 jars if you want
- Tastes genuinely homemade — because it is
Ingredients for Homemade Blackberry Jam
Core Ingredients
| Ingredient | Amount |
|---|---|
| Fresh blackberries | 4 cups (about 2 lbs) |
| Granulated white sugar | 2 cups |
| Fresh lemon juice | 2 tablespoons |
That’s it. Three ingredients. The lemon juice isn’t just for flavor — it adds natural pectin and acidity, which helps the jam set and also preserves it safely.
Optional (With Pectin Method)
- 1 packet (1.75 oz) powdered fruit pectin, such as Sure-Jell
Ingredient Substitutions
Sugar alternatives: You can use cane sugar, beet sugar, or even raw sugar. Honey works but changes the flavor profile noticeably. If you’re reducing sugar, use a low-sugar pectin (like Sure-Jell Pink Box) to compensate for the set.
Blackberry alternatives: This recipe adapts beautifully to mixed berries. Try half blackberries and half raspberries, or swap in boysenberries. The ratio stays the same.
Lemon juice: Bottled lemon juice works fine here — in fact, the USDA actually recommends bottled lemon juice for canning because it has a standardized acidity level. Fresh is lovely for flavor if you’re not canning.
Kitchen Tools You’ll Need
- Large heavy-bottomed saucepan or Dutch oven (at least 5–6 quart)
- Potato masher or fork
- Wooden spoon or heat-resistant silicone spatula
- Fine mesh strainer or food mill (for seedless version)
- Candy or instant-read thermometer (helpful but not required)
- Canning jars with lids and bands (if preserving)
- Jar lifter and water bath canner (if canning)
- Ladle and wide-mouth funnel (makes filling jars much cleaner)
A heavy pot is genuinely important here. Jam gets extremely hot and needs even heat distribution so it doesn’t scorch on the bottom. Thin pots are a recipe for burnt jam and a ruined batch.
Step-by-Step Instructions
Step 1: Prepare Your Blackberries
Rinse your blackberries in a colander under cool running water. Remove any stems, leaves, or berries that look damaged or moldy. You don’t need to dry them completely — a little water clinging to them is fine.
Place the blackberries in your large pot and use a potato masher to crush them. You want most of the berries broken down, but leaving some texture is perfectly fine — it gives the finished jam a rustic, homemade quality.
Step 2: Add Sugar and Lemon Juice
Add the sugar and lemon juice directly to the crushed berries in the pot. Stir everything together until the sugar begins to dissolve into the juice. Let this mixture sit for about 5 minutes — the sugar will pull out more juice from the berries.
Step 3: Cook the Jam
Place the pot over medium-high heat. Stir frequently as the mixture heats up. Once it reaches a full rolling boil (a boil that doesn’t stop when you stir it), continue cooking and stirring.
This is where you need to stay at the stove. Don’t walk away. The jam needs regular stirring to prevent sticking and burning on the bottom.
No-pectin method: Cook for 25–35 minutes, stirring often, until the jam thickens and reaches the gel stage (220°F at sea level, slightly lower at higher altitudes).
With-pectin method: Stir in the pectin before heating. Once you hit a full rolling boil, add all the sugar at once, return to a full boil, and cook for exactly 1 minute. Then remove from heat.
Step 4: Check for Set
The most reliable way to check if your jam is done is the cold plate test:
- Place 2–3 small plates in the freezer before you start cooking
- When you think the jam is ready, drop a small spoonful onto a frozen plate
- Wait 30 seconds, then push the jam with your finger
- If it wrinkles and holds its shape, it’s set
- If it runs and stays liquid, cook for another 3–5 minutes and test again
A thermometer reading of 220°F is another reliable indicator of proper gel set.
Step 5: Skim the Foam
Remove the pot from heat. You’ll likely see some pink foam on the surface — that’s just air bubbles from the cooking process and is totally harmless. Skim it off with a spoon. Some people add a small pat of butter (about ¼ teaspoon) while cooking to reduce foam formation.
Step 6: Fill Your Jars
If you’re not canning:
- Let the jam cool for 10 minutes in the pot, then ladle into clean jars
- Let cool completely at room temperature before refrigerating
If you’re canning (see full canning instructions below):
- Ladle hot jam into hot sterilized jars, leaving ¼-inch headspace
- Wipe jar rims, apply lids and bands, and process in a water bath
Expert Tips From Real Experience
Don’t double the recipe. I know it’s tempting when you have a big batch of berries. But jam doesn’t scale well. A larger volume takes longer to come to temperature, which affects the set and can produce runny jam. Make two separate batches instead.
Use slightly underripe berries (a handful). Underripe fruit has more natural pectin. If all your berries are super ripe and sweet, your jam may be slower to set. Tossing in 10–15% slightly underripe berries makes a noticeable difference.
Measure your fruit after crushing, not before. Berry volume changes significantly when crushed. For consistent results, crush first, then measure out 2 cups of crushed berry pulp and juice.
Sterilize your jars even if you’re just refrigerating. Run them through the dishwasher on hot or pour boiling water inside them. It dramatically extends shelf life for refrigerator jam.
Common Mistakes to Avoid
Using a pot that’s too small. Jam bubbles up aggressively during cooking. Use a pot at least 3 times the volume of your ingredients. A pot that’s too small means dangerous overflow and a huge mess on your stovetop.
Not stirring enough. Set it and forget it doesn’t work with jam. Sugar burns quickly. Keep stirring, especially in the last 10 minutes of cooking.
Adding pectin at the wrong time. If you’re using powdered pectin, it goes in before the sugar. If you’re using liquid pectin, it goes in after cooking. Getting this backward leads to a batch that won’t set.
Skipping the cold plate test. Time is a rough guide — the plate test tells you the actual truth. Humidity, altitude, the exact ripeness of your fruit, and stove temperature all affect cooking time.
Filling cold jars with hot jam. Thermal shock can crack glass jars. Always warm your jars first, either in the canning pot water or in a low oven.
Seedless Blackberry Jam Option
If you find blackberry seeds distracting (they can be quite firm), seedless jam is an easy adjustment. Here’s how:
After crushing the blackberries and before adding the sugar, press the crushed berries through a fine mesh strainer or food mill. Use a spoon to push as much juice and pulp through as possible — just leave the seeds behind.
You’ll lose some volume, so you may want to start with 5 cups of whole berries to end up with enough strained pulp for the recipe. Measure your seedless pulp after straining, then continue with the recipe as normal.
The finished jam will be smoother, deeper in color, and has a slightly more intense flavor since you’re concentrating the pure juice and pulp.
Pectin vs. No-Pectin Method: Which Is Better?
This is one of the most common questions I get about easy blackberry preserves, and honestly, both methods work beautifully. Here’s a quick breakdown:
No-Pectin Blackberry Jam
Pros:
- Fewer ingredients, more natural
- Deeper, more concentrated berry flavor (longer cooking caramelizes the fruit slightly)
- No risk of a gummy or overly firm set
Cons:
- Takes longer
- Slightly less reliable set, especially with very ripe berries
- Higher sugar content needed for proper preservation
Best for: Purists who love traditional methods and intense blackberry flavor.
With-Pectin Blackberry Jam
Pros:
- Faster (under 20 minutes of cooking)
- More reliable, consistent set
- Can use less sugar (with low-sugar pectin)
- Brighter, fresher berry color and flavor
Cons:
- Extra ingredient to buy
- Can set too firm if you accidentally over-measure pectin
Best for: First-time jam makers or anyone who wants a consistent result every time.
Both methods produce a jam that’s excellent on toast, biscuits, or swirled into yogurt. My personal preference is the no-pectin method when I have good-quality fresh berries, and the pectin method when I’m using frozen berries (which have less natural pectin).
Flavor Variations to Try
Blackberry Vanilla Jam: Add 1 teaspoon of pure vanilla extract after removing from heat. It rounds out the tartness beautifully.
Blackberry Ginger Jam: Stir in 1 tablespoon of freshly grated ginger with the sugar. The spice is subtle but adds a really lovely warmth.
Blackberry Lemon Zest Jam: Add the zest of one lemon along with the lemon juice. Adds a bright, citrusy note that makes the jam taste more complex.
Blackberry Bourbon Jam: Stir in 2 tablespoons of good bourbon after removing from heat. The alcohol mostly cooks off but leaves behind a smoky, warm flavor. Makes a spectacular gift.
Blackberry Mint Jam: Add 5–6 fresh mint leaves during cooking, then remove before jarring. Refreshing and unexpected.
Spiced Blackberry Jam: Add ¼ teaspoon each of cinnamon and cardamom. Wonderful on scones or paired with soft cheese on a charcuterie board.
Canning & Storage Instructions
Refrigerator Jam (Easiest Option)
If you’re making a small batch and plan to use it within a few weeks, refrigerator jam requires no special equipment:
- Let jam cool in the pot for 10–15 minutes
- Ladle into clean glass jars
- Cool completely uncovered at room temperature (about 2 hours)
- Seal and refrigerate
Shelf life: Up to 3 weeks in the refrigerator.
Freezer Jam
Pour cooled jam into freezer-safe containers, leaving ½ inch of headspace for expansion. Cool completely before freezing.
Shelf life: Up to 1 year in the freezer. Thaw overnight in the refrigerator.
Water Bath Canning (Long-Term Storage)
This is the method that gives you shelf-stable jam you can store for up to a year and give as gifts.
Step 1: Sterilize jars. Place clean jars in your canning pot, cover with water, bring to a boil, and boil for 10 minutes. Keep them hot until ready to fill.
Step 2: Prepare lids. Warm lids in hot (not boiling) water to soften the sealing compound.
Step 3: Fill jars. Ladle hot jam into hot jars, leaving ¼ inch of headspace. Run a clean chopstick or thin spatula around the inside edge to release air bubbles.
Step 4: Wipe rims. Use a clean damp cloth to wipe any jam off the jar rims — a clean rim is essential for a proper seal.
Step 5: Apply lids and bands. Place lids on jars, then screw on bands until fingertip tight (snug but not cranked down hard).
Step 6: Process. Lower jars into boiling water (they should be covered by at least 1 inch of water). Process for 10 minutes (adjusting for altitude — add 1 minute per 1,000 feet above 1,000 feet elevation).
Step 7: Cool and check seals. Remove jars and place on a towel-lined counter. Don’t tilt or move them for 12–24 hours. You should hear the satisfying ping of lids sealing as they cool. Press the center of each lid — it should be firm and not flex up and down.
Shelf life: Up to 1 year in a cool, dark pantry. Once opened, refrigerate and use within 3 weeks.
Safety note: Always follow current USDA or Ball Canning guidelines for safe home canning. Do not modify the sugar or lemon juice amounts in recipes intended for canning, as these affect acidity and safety.
Estimated Nutrition Information
Per 1 tablespoon serving (approximate, no-pectin recipe)
| Nutrient | Amount |
|---|---|
| Calories | 45 kcal |
| Total Carbohydrates | 11 g |
| Sugars | 10 g |
| Dietary Fiber | 0.5 g |
| Total Fat | 0 g |
| Protein | 0 g |
| Sodium | 0 mg |
| Vitamin C | 3% DV |
Nutrition will vary based on berry sweetness and exact sugar amount used. Values calculated using standard nutritional databases and are estimates only.
FAQs About Homemade Blackberry Jam
Why is my blackberry jam runny?
The most common reason is undercooking. If the jam didn’t reach 220°F (gel stage), it won’t set properly. Another culprit is using very ripe, low-pectin fruit without adding pectin. The good news: you can re-cook runny jam. Return it to the pot, bring it back to a boil, and cook for another 5–10 minutes before testing again.
Can I use frozen blackberries for this recipe?
Yes, absolutely. Frozen blackberries work great — thaw them first and use them with all their accumulated juice. The jam may take slightly longer to set since frozen berries have more water content and less natural pectin. You may want to add a packet of pectin when using frozen fruit.
How do I know when blackberry jam is done without a thermometer?
Use the cold plate test described in Step 4. Place a small spoonful on a frozen plate, wait 30 seconds, and push it with your finger. If it wrinkles and holds its shape, it’s ready. If it runs, keep cooking.
Why does my jam taste too sweet?
You may have used overripe berries (which are higher in sugar) or you can reduce the sugar slightly next time. You can also add an extra tablespoon of lemon juice to balance sweetness. For future batches, slightly underripe berries add a pleasant tartness.
Can I reduce the sugar in homemade blackberry jam?
Yes, but if you’re canning it, be careful. The sugar acts as a preservative. If you reduce sugar significantly, switch to a low-sugar pectin product and follow those specific package instructions for safe canning ratios. For refrigerator or freezer jam, you have more flexibility.
How long does homemade blackberry jam last?
- Refrigerator jam: Up to 3 weeks after opening
- Properly canned (water bath processed) jam: Up to 1 year unopened, then 3 weeks once open
- Freezer jam: Up to 1 year frozen
What can I do with blackberry jam besides putting it on toast?
So many things! Stir it into plain yogurt or oatmeal, use it as a filling for thumbprint cookies, spread it between cake layers, spoon it over vanilla ice cream, mix it into salad dressing with olive oil and balsamic vinegar, or use it as a glaze on grilled chicken or pork.