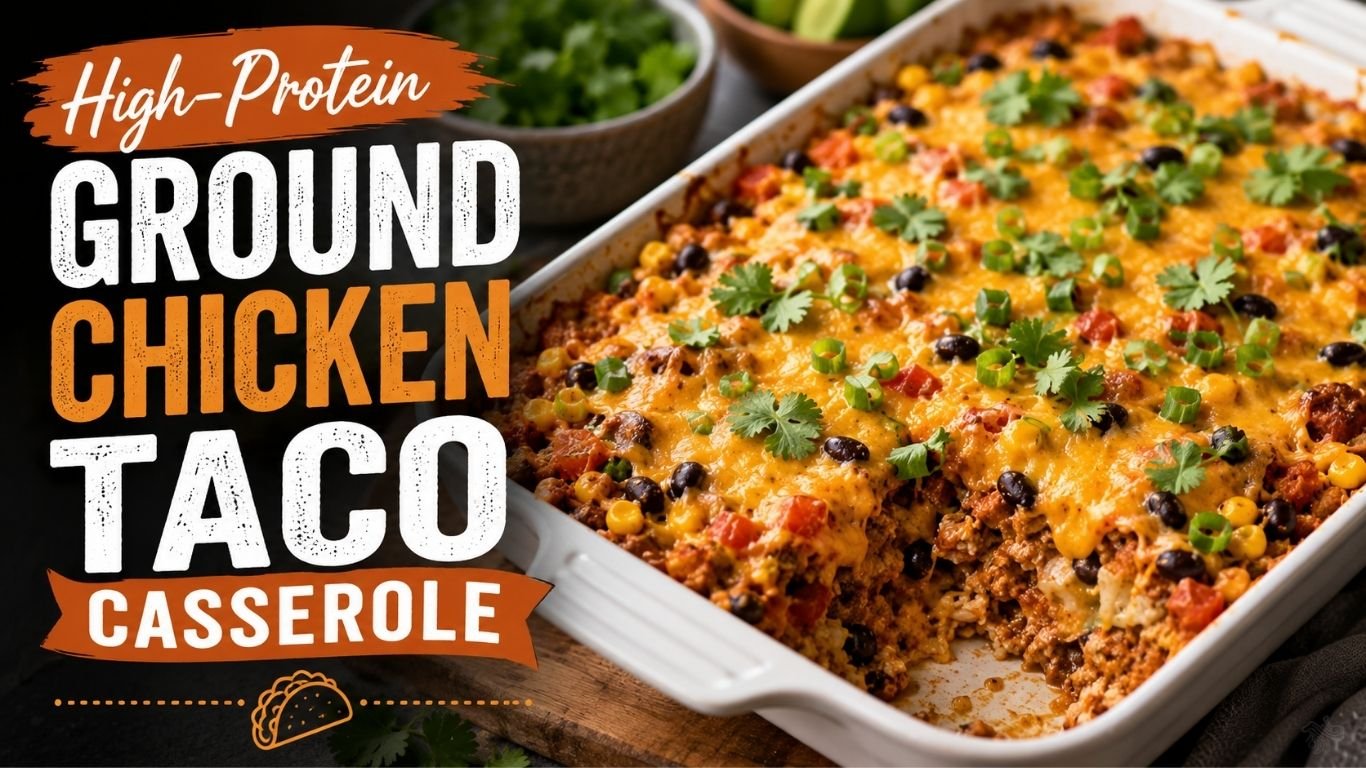
Some recipes just work. You know the kind — the ones that come together in under an hour, taste like you put in way more effort than you actually did, and have everyone coming back for seconds without you saying a word.
This High-Protein Ground Chicken Taco Casserole is exactly that kind of recipe.
I started making this on busy Tuesday nights when taco night felt too fussy and I didn’t want to do individual assembly for four people. Layering everything into one pan was the obvious fix, and after a few rounds of tweaking the spice blend and figuring out the right cheese-to-tortilla ratio (yes, that’s a science), this casserole became a regular in my rotation.
What makes it stand out isn’t just the convenience — it’s the protein content. Ground chicken is naturally lean, and when you pair it with black beans, cheese, and a smart tortilla base, you end up with a dish that genuinely fuels you. We’re talking 35–40 grams of protein per serving, depending on your portions and toppings.
Whether you’re feeding a hungry family, prepping meals for the week, or just tired of the same old dinners, this ground chicken taco casserole checks every box.
Why You’ll Love This Recipe
Let me give you the quick pitch before we get into the details:
- High in protein — ground chicken plus black beans makes this legitimately filling
- One pan cleanup — everything bakes in a single casserole dish
- Ready in about 45 minutes — faster than most casseroles without sacrificing flavor
- Family-friendly — kids love the cheesy, taco-spiced layers
- Meal prep gold — it reheats beautifully and tastes even better the next day
- Easily customizable — swap proteins, adjust heat, or make it gluten-free in minutes
- Budget-conscious — ground chicken is affordable, and pantry staples carry most of the weight here
This isn’t a complicated recipe that requires culinary school knowledge. It’s real food, made simply, and it delivers every single time.
Ingredients
Here’s everything you need to make this casserole for 6 servings.
For the Ground Chicken Taco Filling
- 1½ lbs ground chicken (93% lean works best for texture)
- 1 tablespoon olive oil
- 1 small yellow onion, diced
- 3 cloves garlic, minced
- 1 can (15 oz) black beans, drained and rinsed
- 1 can (10 oz) diced tomatoes with green chiles (like Rotel)
- ½ cup corn kernels (frozen and thawed, or canned)
- 2 tablespoons taco seasoning (store-bought or homemade — see tip below)
- ½ teaspoon smoked paprika
- ¼ teaspoon cumin
- Salt and pepper to taste
- ⅓ cup chicken broth (keeps the filling moist)
For the Casserole Layers
- 8–10 small flour tortillas (or corn tortillas for gluten-free)
- 1½ cups shredded Mexican cheese blend, divided (or use Monterey Jack, cheddar, or pepper jack)
- ½ cup plain Greek yogurt or sour cream (stirred into the filling for creaminess)
Optional Toppings
- Fresh cilantro
- Sliced jalapeños
- Diced avocado or guacamole
- Pico de gallo
- Hot sauce
- Lime wedges
- Shredded lettuce
Ingredient Substitutions and Swaps
Ground chicken substitutions:
- Ground turkey works nearly identically here — same texture, similar protein content
- Ground beef (85% lean) adds more richness if you prefer a heartier flavor
- For a plant-based version, use crumbled tofu, lentils, or a meat substitute like Beyond Meat
Tortilla swaps:
- Corn tortillas make this naturally gluten-free and add a slightly more authentic taco flavor
- Low-carb tortillas work if you’re watching carbs — the casserole holds together fine
- You can skip the tortilla base entirely and serve it over cauliflower rice or plain rice
Bean alternatives:
- Pinto beans, kidney beans, or chickpeas all work in place of black beans
- Skip the beans entirely for a lower-carb version (the protein will drop slightly)
Cheese options:
- Cotija crumbled on top adds a more authentic flavor
- Dairy-free cheese melts work for lactose-free needs, though the texture will differ slightly
Making your own taco seasoning:
Mix together 1 tsp chili powder, ½ tsp cumin, ½ tsp garlic powder, ¼ tsp onion powder, ¼ tsp oregano, ¼ tsp smoked paprika, and a pinch of cayenne. It’s fresher and you control the salt.
Kitchen Tools You’ll Need
Nothing fancy required here:
- Large skillet or sauté pan (for cooking the filling)
- 9×13 inch casserole dish (glass or ceramic both work)
- Wooden spoon or spatula
- Cutting board and knife
- Measuring cups and spoons
- Aluminum foil (for the initial bake)
Optional but helpful:
- A garlic press (if mincing garlic is your least favorite task)
- A can opener if yours is manual (you’ll open several cans)
Step-by-Step Instructions
Step 1: Get the Oven Ready
Preheat your oven to 375°F (190°C). Spray a 9×13 inch baking dish with cooking spray or rub it lightly with olive oil. Set it aside — you’ll come back to it once the filling is done.
Step 2: Soften the Aromatics
Set your large skillet over medium heat and add 1 tablespoon of olive oil. Once the oil shimmers, add the diced onion and cook for 4–5 minutes, stirring occasionally, until it’s softened and the edges start to look translucent.
Add the minced garlic and stir constantly for about 30 seconds. Garlic burns fast over medium heat — you’ll know it’s ready when your kitchen smells amazing and the garlic turns light golden, not brown.
Step 3: Cook the Ground Chicken
Turn the heat up to medium-high and add the ground chicken directly to the skillet.
Break it apart with your spatula or spoon into small, even crumbles. Ground chicken tends to release more moisture than beef, so keep breaking it apart and stirring as it cooks. You’ll see liquid gathering in the pan — that’s normal.
Cook for 7–9 minutes until no pink remains and the chicken has some light browning on the edges. If there’s excess liquid pooled in the skillet, carefully drain it or use a turkey baster to remove it. Too much liquid will make your casserole soggy.
Step 4: Build the Flavor
With the heat back at medium, add:
- Taco seasoning
- Smoked paprika
- Ground cumin
- Salt and pepper
Stir everything together so the seasoning coats the chicken evenly. Cook for 1–2 minutes, letting the spices bloom in the heat — this step makes a real difference in how the filling tastes.
Step 5: Add the Remaining Filling Ingredients
Pour in the diced tomatoes with green chiles, drained black beans, thawed corn, and chicken broth. Stir everything together and bring it to a gentle simmer.
Let the filling cook uncovered for 4–5 minutes, stirring occasionally, until most of the liquid has been absorbed and the mixture looks thick and scoopable. It should not look wet or soupy. This is the most important thing to get right before layering.
Remove the skillet from heat. Stir in the Greek yogurt until fully incorporated — it melts right in and adds a creamy, slightly tangy quality that balances the spice perfectly.
Taste the filling and adjust seasoning now. Everything should taste bold and slightly over-seasoned at this stage, because the tortillas and cheese will mellow it out during baking.
Step 6: Warm Your Tortillas
Warm the tortillas briefly before layering — either in the microwave for 10–15 seconds wrapped in a damp paper towel, or in a dry skillet for 20 seconds per side.
Warm tortillas are more pliable and less likely to crack or leave gaps in your layers. This is a small step that pays off in the final texture.
Step 7: Layer the Casserole
Now comes the part that makes this a casserole instead of just taco meat in a pan:
Layer 1 — Tortillas:
Arrange tortillas across the bottom of the greased baking dish. You’ll need to tear some to fit into corners or gaps. Don’t stress about perfection — coverage matters more than how it looks.
Layer 2 — Filling:
Spoon half the ground chicken mixture evenly over the tortillas. Use the back of your spoon to spread it all the way to the edges.
Layer 3 — Cheese:
Sprinkle ½ cup of shredded cheese over the filling. Distribute it evenly rather than piling it in the center.
Layer 4 — Repeat:
Add another layer of tortillas, the remaining filling, and another ½ cup of cheese.
Final Top Layer:
Add a last layer of tortillas and top with the remaining ½ cup of cheese. This top cheese layer is what browns and bubbles in the oven, so be generous here.
Step 8: Bake Covered
Cover the casserole dish tightly with aluminum foil — press the edges down so steam can’t escape easily. Place it on the middle rack of your preheated oven.
Bake covered for 20 minutes. This phase steams the tortillas into the filling and heats everything through without drying out the top.
Step 9: Bake Uncovered for the Golden Finish
Remove the foil carefully — the steam will be hot. Put the casserole back in the oven uncovered and bake for another 8–10 minutes, until the top cheese layer is melted, bubbling, and starting to brown at the edges.
If you want more browning on top, switch your oven to the broiler on high and broil for 1–2 minutes. Stand at the oven and watch it — cheese goes from perfectly golden to burnt surprisingly fast under a broiler.
Step 10: Rest Before Slicing
Take the casserole out of the oven and let it rest, uncovered, for 5 full minutes before you cut into it.
I know it’s hard to wait when it smells like this. But cutting it too soon means the layers slide apart and you lose the structure that makes it satisfying to serve. Five minutes. Then dig in.
Expert Tips for the Best Ground Chicken Taco Casserole
These are the little details that separate a good casserole from a great one:
Don’t skip the resting time. Five minutes feels like forever when you’re hungry, but it makes a real difference in how cleanly the casserole slices.
Dry out the filling properly. If you add too much liquid, the casserole becomes mushy. Simmer the filling until it’s thick — it should look almost like a hearty taco meat mixture, not a stew.
Warm the tortillas slightly before layering. Warm tortillas are more pliable and less likely to crack when you’re pressing them into the dish. A quick 10-second microwave works fine.
Add heat gradually. If you’re feeding a mixed crowd (kids and spice lovers), keep the filling mild and offer hot sauce or pickled jalapeños on the side.
Use freshly shredded cheese if you can. Pre-shredded cheese has anti-caking agents that prevent it from melting as smoothly. It’ll still work, but freshly shredded Monterey Jack or cheddar melts better.
Season in layers. Don’t just season the meat — taste the filling before you layer it and adjust. Everything should taste slightly bolder than you’d expect, since the tortillas and cheese will mellow the overall flavor.
Frequently Asked Questions
Can I use ground chicken breast instead of regular ground chicken?
Yes, but it requires a small adjustment. Ground chicken breast (99% lean) has very little fat, which means it dries out more easily during cooking. To prevent this, add an extra splash of chicken broth during cooking and make sure you stir the Greek yogurt into the filling before layering. The added moisture from both of those steps keeps it from becoming dry after baking.
Why is my casserole watery after baking?
This is the most common problem, and it almost always comes down to the filling. If the filling wasn’t simmered long enough before layering, the excess moisture continues releasing during baking and pools at the bottom of the dish. Simmer until the liquid is nearly gone — it should look like thick taco meat, not a stew. Also drain your canned beans and corn completely, and pat the corn dry before adding.
Can I make this gluten-free?
Easily. Substitute flour tortillas with certified gluten-free corn tortillas. Also check your taco seasoning packet — some brands add wheat starch as a filler. Making your own spice blend (recipe in the ingredients section above) eliminates this risk. Everything else in the recipe is naturally gluten-free.
How do I prevent the tortillas from getting soggy?
Three things help: keep the filling thick before layering, use medium-thickness tortillas rather than the thinnest street taco style, and let the casserole rest for at least 5 minutes after baking. Resting gives the layers time to firm up so they hold together when you slice and serve. Also, warming the tortillas before layering makes them slightly sturdier going into the oven.
Can I add uncooked rice directly to the casserole?
No — uncooked rice needs more liquid and time than this casserole provides. Always add pre-cooked rice. Stir 1 cup of cooked rice into the filling after step 5, then layer as usual. It adds bulk, makes the casserole more filling, and stretches it to feed more people without significantly changing the flavor.
Is this casserole spicy?
At its base, it’s mildly spiced — flavorful rather than hot. If your taco seasoning has some heat, the Rotel adds a subtle kick, but it’s not overwhelming. For a milder version, use plain diced tomatoes instead of Rotel and choose a mild taco seasoning. For more heat, add cayenne to the filling or serve with hot sauce at the table so heat-seekers can adjust their own portions.
Can I double this recipe?
Yes, and I’d encourage it if you’re meal prepping. Use two separate 9×13 pans rather than trying to make one deeper layer in a single pan — thick layers don’t cook evenly. Bake both pans at the same time on separate oven racks, rotating them halfway through. Eat one immediately and freeze the other in individual portions.
Key Takeaways
Here’s the short version if you want the facts fast:
- This casserole provides approximately 38g of protein per serving from ground chicken, black beans, Greek yogurt, and cheese
- Total time is around 45 minutes — 15 minutes of prep and 30 minutes of baking
- The most critical step is simmering the filling until it’s thick — wet filling leads to a soggy casserole
- It’s easily adapted for gluten-free, low-carb, dairy-free, or plant-based dietary needs with simple swaps
- This recipe is meal prep ready — prepare the filling up to 3 days ahead, build the night before, or freeze the fully assembled casserole for up to 3 months
- Leftovers reheat best in an air fryer at 325°F for that fresh-out-of-the-oven quality
- Adding Greek yogurt to the filling (not just as a topping) is the secret to a creamy, high-protein base that doesn’t taste like diet food
Conclusion
Weeknight dinners don’t have to be boring, complicated, or nutritionally hollow. This High-Protein Ground Chicken Taco Casserole proves that you can have all the things at once — real taco flavor, serious protein content, easy cleanup, and a recipe that actually gets better as the week goes on.
What started as a way to simplify taco night in my own kitchen became one of the most reliable recipes I make. The layers, the spiced filling, the melted cheese pulling apart when you serve it — there’s something genuinely satisfying about pulling this out of the oven.
Make it once and see how your family responds. Then make it again the following week and tweak something — a little more heat, a different cheese, sweet potato in the filling. The base recipe gives you a framework, and the variations give you somewhere to go from there.
That’s what a good recipe should do. This one does it.