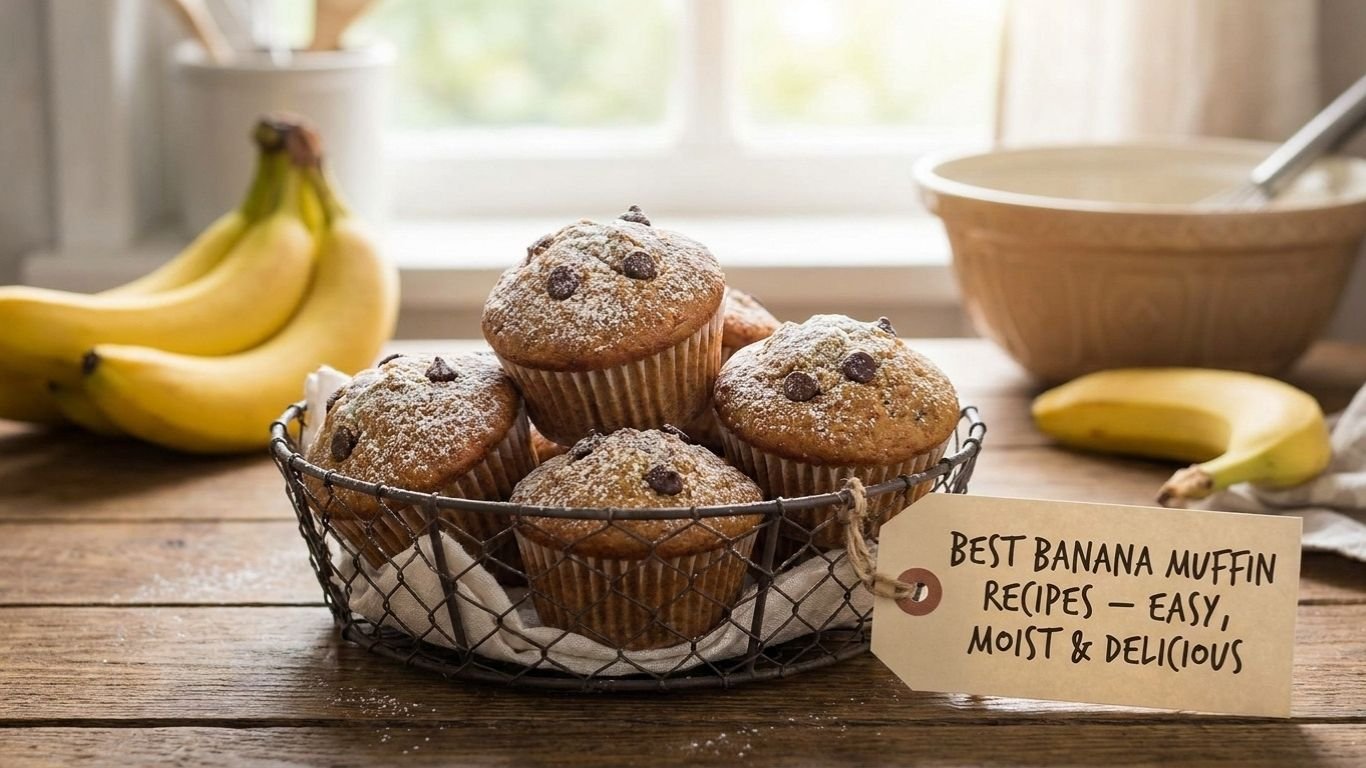
If you’ve got a few overripe bananas sitting on your counter and no real plan for them, banana muffin recipes are honestly the best solution you’ll find. These muffins are soft, naturally sweet, incredibly moist, and they come together faster than most people expect. No mixer required. No fancy ingredients. Just simple pantry staples and about half an hour of your time.
I’ve made banana muffins more times than I can count — for school mornings, weekend brunches, freezer stashes, and everything in between. This article covers everything you need to know, from the basic classic recipe to healthier swaps, creative variations, and all the little tricks that make a real difference in the final result.
Whether you’re a first-time baker or someone who’s been in the kitchen for years, you’re going to love how simple and reliable these are.
Why You’ll Love These Banana Muffin Recipes
- Ready in 30 minutes — from mixing bowl to cooling rack, start to finish
- No mixer needed — just two bowls and a wooden spoon or spatula
- Uses up overripe bananas — the riper, the better (more natural sweetness)
- Kid-approved — soft, lightly sweet, and easy to customize
- Freezer-friendly — bake a batch and freeze for up to 3 months
- Budget-friendly — made entirely from affordable pantry staples
- Easily customizable — add chocolate chips, nuts, blueberries, or spices
- Great for meal prep — make ahead and grab them throughout the week
Why This Recipe Works (The Food Science)
Understanding why a recipe works helps you troubleshoot when something goes off — and honestly, it just makes you a more confident baker.
Overripe bananas do two important things. First, they add natural sugar as the starches break down during ripening, which means you don’t need as much added sugar. Second, the soft, almost liquid texture of very ripe bananas adds moisture to the batter that keeps the muffins soft for days.
Oil instead of butter keeps the crumb tender longer. Butter creates a richer flavor, but oil produces a more consistently moist texture because it stays liquid at room temperature. (You can use either — I’ll explain both below.)
The two-bowl method — mixing wet and dry ingredients separately before combining — limits gluten development. Gluten builds when flour gets mixed with liquid and worked too hard. Less gluten = lighter, more tender muffins.
Baking soda reacts with the natural acidity in the bananas (and any buttermilk or yogurt you might add) to create lift, which is how you get that beautiful dome on top.
Room temperature eggs incorporate more smoothly into the batter and help everything come together more evenly, which improves texture.
Ingredients You’ll Need
Main Ingredients
| Ingredient | Amount | Purpose |
|---|---|---|
| Very ripe bananas (mashed) | 3 large (~1½ cups) | Moisture, natural sweetness, flavor |
| All-purpose flour | 2 cups | Structure |
| Granulated sugar | ¾ cup | Sweetness and moisture retention |
| Eggs (room temperature) | 2 large | Binding and structure |
| Vegetable oil (or melted butter) | ⅓ cup | Moisture and tenderness |
| Milk or buttermilk | ¼ cup | Loosens batter, adds tenderness |
| Baking soda | 1 teaspoon | Leavening agent |
| Baking powder | ½ teaspoon | Additional lift |
| Salt | ½ teaspoon | Enhances all the flavors |
| Vanilla extract | 1 teaspoon | Rounds out the sweetness |
| Ground cinnamon | ½ teaspoon | Warm background flavor (optional but recommended) |
Optional Add-Ins
- ½ cup chocolate chips (semi-sweet or dark)
- ½ cup chopped walnuts or pecans
- ½ cup blueberries (fresh or frozen)
- 2 tablespoons peanut butter (swirled in)
- 1 teaspoon lemon zest (brightens the flavor)
- ¼ cup shredded coconut
Healthy Substitutions
- Flour: Swap up to half the all-purpose flour for whole wheat flour for added fiber
- Sugar: Use coconut sugar, maple syrup, or honey (reduce milk slightly if using liquid sweetener)
- Oil: Replace with unsweetened applesauce or Greek yogurt for a lower-fat version
- Eggs: Use flax eggs (1 tbsp ground flaxseed + 3 tbsp water per egg) for a vegan option
Dietary Variations
- Gluten-free: Use a 1:1 gluten-free flour blend (I recommend King Arthur’s Measure for Measure)
- Dairy-free: Use oat milk, almond milk, or coconut milk in place of regular milk
- Vegan: Combine the egg and dairy substitutions above
- Lower sugar: Reduce sugar to ½ cup — the ripe bananas provide plenty of sweetness on their own
How to Make Banana Muffins – Step by Step
Step 1: Preheat Your Oven and Prep Your Pan
Preheat the oven to 375°F (190°C). Line a 12-cup muffin tin with paper liners or spray it well with non-stick cooking spray. If you want taller, bakery-style domes, you can fill every other cup and leave the alternating cups empty — this allows better heat circulation around each muffin.
Common mistake to avoid: Skipping the liner or using inadequate spray leads to muffins that stick and tear when you remove them. Don’t skip this step.
Step 2: Mash Your Bananas
Peel your bananas and place them in a large bowl. Use a fork or potato masher to mash them until mostly smooth with just a few small lumps remaining. A few lumps are perfectly fine — they actually add pockets of banana flavor to the finished muffin.
What to look for: The mashed banana should look like thick, chunky baby food. If your bananas are extremely ripe (black or very spotted), they’ll mash even easier and taste sweeter.
Chef’s Note: The riper the banana, the better. Brown or even black-skinned bananas are sweeter and have a more concentrated banana flavor. If your bananas aren’t ripe enough, you can ripen them quickly by placing unpeeled bananas on a baking sheet at 300°F for 15–20 minutes until the skins turn black. Cool before using.
Step 3: Mix the Wet Ingredients
To the mashed bananas, add the eggs, oil (or melted butter), milk, vanilla extract, and sugar. Whisk everything together until well combined. The mixture will look slightly lumpy because of the banana — that’s completely normal and expected.
Common mistake to avoid: Don’t add melted butter that’s too hot. If it’s steaming hot, it can partially cook the eggs when they hit the batter. Let melted butter cool for a minute or two before adding it.
Step 4: Combine the Dry Ingredients
In a separate bowl, whisk together the flour, baking soda, baking powder, salt, and cinnamon. Mixing them separately ensures the leavening agents and salt are evenly distributed throughout the flour before anything gets wet.
What to look for: The dry ingredients should look uniform in color with no visible clumps of baking soda.
Step 5: Fold Wet Into Dry (The Most Important Step)
Pour the wet ingredients into the bowl of dry ingredients. Use a rubber spatula or wooden spoon to fold everything together with gentle strokes — scraping from the bottom of the bowl up and over. Stop mixing the moment you no longer see dry streaks of flour.
The batter should look slightly lumpy. That’s a good sign. Smooth, glossy batter almost always means the batter has been overmixed, which develops too much gluten and leads to dense, chewy muffins.
Common mistake to avoid: Stirring in circles like you’re mixing soup. Use a fold-and-turn motion instead. It makes a noticeable difference in texture.
Chef’s Note: If you’re adding chocolate chips, nuts, or other mix-ins, fold them in gently at this stage — just 3 or 4 folds. You don’t want to overwork the batter at this point.
Step 6: Fill the Muffin Cups
Use a cookie scoop or large spoon to divide the batter evenly among the 12 muffin cups. Fill each cup about ¾ full — not all the way to the top. The muffins will rise during baking, and leaving some space prevents overflow.
What to look for: All cups should look roughly the same level so they bake evenly. An ice cream scoop works perfectly for this.
Step 7: Bake to Perfection
Bake at 375°F for 20–22 minutes until the tops are golden brown and a toothpick inserted into the center comes out clean or with just a crumb or two attached. Wet batter on the toothpick means they need more time.
Common mistake to avoid: Opening the oven door too early. The rapid change in temperature can cause muffins to sink in the middle. Wait until at least the 18-minute mark before checking.
Step 8: Cool Before Eating
Let the muffins cool in the pan for 5 minutes, then transfer them to a wire rack to cool completely. They’ll continue cooking slightly from residual heat even after they come out of the oven.
Common mistake to avoid: Leaving them in the tin too long. The steam can make the bottoms soggy. Five minutes in the pan is enough.
Common Mistakes to Avoid
Overmixing the Batter
Cause: Stirring too long after combining wet and dry ingredients.
Solution: Stop mixing as soon as the flour disappears. A few lumps are fine.
Using Underripe Bananas
Cause: Yellow bananas don’t have enough sugar or moisture.
Solution: Use spotted or brown bananas. Ripen in the oven if needed (see Step 2 above).
Measuring Flour Incorrectly
Cause: Scooping directly from the bag compresses the flour.
Solution: Spoon flour into the measuring cup, then level with a straight edge.
Overbaking
Cause: Every oven runs slightly differently — some run hot.
Solution: Start checking at 18 minutes. Muffins are done when a toothpick comes out clean.
Skipping the Rest Time
Cause: Cutting into a muffin fresh from the oven.
Solution: Let them cool at least 10 minutes. The interior finishes setting as it cools.
Serving Suggestions
- Spread with peanut butter or almond butter for a filling breakfast
- Drizzle with honey right before eating for extra sweetness
- Pair with coffee or tea — the banana flavor complements both beautifully
- Serve with fresh fruit on the side for a light brunch plate
- Top with cream cheese frosting to turn them into a dessert-style treat
- Pack in lunchboxes alongside a piece of fruit and string cheese for kids
Storage Instructions
Room Temperature: Store in an airtight container at room temperature for up to 3 days. Place a paper towel inside the container to absorb excess moisture.
Refrigerator: Store in an airtight container for up to 1 week. Bring to room temperature or warm briefly before eating.
Freezer: Wrap each muffin individually in plastic wrap, then place in a zip-lock freezer bag. Freeze for up to 3 months. Label with the date.
Troubleshooting Guide
Muffins are too dense: Overmixed batter or too much flour. Mix less next time and measure flour carefully.
Muffins are too dry: Overbaked, or not enough banana. Check at 18 minutes next time, and make sure you have at least 1½ cups of mashed banana.
Sinking in the middle: Usually means underbaked or too much leavening. Make sure baking soda is fresh (less than 6 months old).
Sticky, wet texture inside: Underbaked. Put them back in the oven for 3–5 more minutes.
Burnt edges: Oven is running too hot. Invest in an oven thermometer — many ovens are off by 25°F or more.
Flat tops, no dome: Oven temp too low, or the batter was too thin. Try the 425°F trick in the first 5 minutes.
Muffins stuck to the tin: Always line with paper cups or spray thoroughly. For stubborn muffins, run a butter knife around the edge gently.
Frequently Asked Questions
1. What are the best bananas to use for banana muffins?
The best bananas are very ripe ones with brown or black spotted skins. They’re sweeter, softer, and have a much stronger banana flavor than yellow bananas. The riper, the better — don’t throw those brown bananas away.
2. Can I make banana muffins without eggs?
Yes. Replace each egg with a flax egg (1 tablespoon ground flaxseed mixed with 3 tablespoons water, rested for 5 minutes). Mashed banana itself also acts as a natural binder, so egg-free versions usually work well in this recipe.
3. Why are my banana muffins dense?
Dense banana muffins are almost always caused by overmixing the batter. Once you add the wet ingredients to the dry, mix only until just combined. Lumpy batter is perfectly fine.
4. Can I freeze banana muffin batter?
It’s better to freeze the baked muffins rather than the batter. Leavening agents start working when they come in contact with liquid, so frozen batter may not rise as well. Baked muffins freeze beautifully for up to 3 months.
5. How do I know when banana muffins are done baking?
Insert a toothpick into the center of a muffin. If it comes out clean or with just a dry crumb or two, they’re done. If wet batter sticks to the toothpick, bake for another 3–4 minutes.
6. Can I use frozen bananas for banana muffins?
Absolutely. Thaw frozen bananas completely, drain any excess liquid, and mash as usual. Frozen and thawed bananas are often even sweeter than fresh overripe ones because the freezing process breaks down the cell walls.
7. How many bananas do I need for banana muffins?
You’ll need about 3 large very ripe bananas, which gives you approximately 1½ cups of mashed banana. This is the sweet spot for flavor and moisture in a 12-muffin batch.
8. Can I make banana muffins with oil instead of butter?
Yes, and most bakers actually prefer oil for muffins because it creates a more consistently moist crumb. Vegetable oil, coconut oil, and avocado oil all work well. If you want the richer buttery flavor, melted butter is a great alternative.
9. What can I add to banana muffins for extra flavor?
Chocolate chips, walnuts, pecans, blueberries, shredded coconut, peanut butter, a swirl of Nutella, cinnamon, nutmeg, or espresso powder all work wonderfully. Start with ½ cup of any add-in per batch.
10. Can I make banana muffins gluten-free?
Yes. Use a 1:1 gluten-free all-purpose flour blend. Make sure it contains xanthan gum, which provides the binding that regular flour normally handles. The texture is slightly different but still very enjoyable.